
Everything You Need to Know About Full Vehicle Restoration
Restoring a vehicle is more than a mechanical project; it is an act of preservation, a labor of love, and a journey into the soul of automotive history. Whether you are breathing life into a rusted family heirloom or resurrecting a classic muscle car found in a forgotten barn, full restoration is the most comprehensive undertaking an enthusiast can face. Unlike a simple refurbishment, a full restoration involves stripping a vehicle down to its bare chassis and rebuilding every nut, bolt, and wire to meet or exceed its original factory specifications.
The path from a “basket case” to a showroom-quality masterpiece is long, expensive, and occasionally frustrating. However, the reward of hearing that engine fire up for the first time in decades is unparalleled. To succeed, you need a disciplined strategy, a realistic budget, and a deep understanding of the phases involved. This guide will walk you through the essential stages of a full-scale restoration, offering technical insights and practical advice to help you cross the finish line.
The Blueprint: Initial Assessment and Inventory
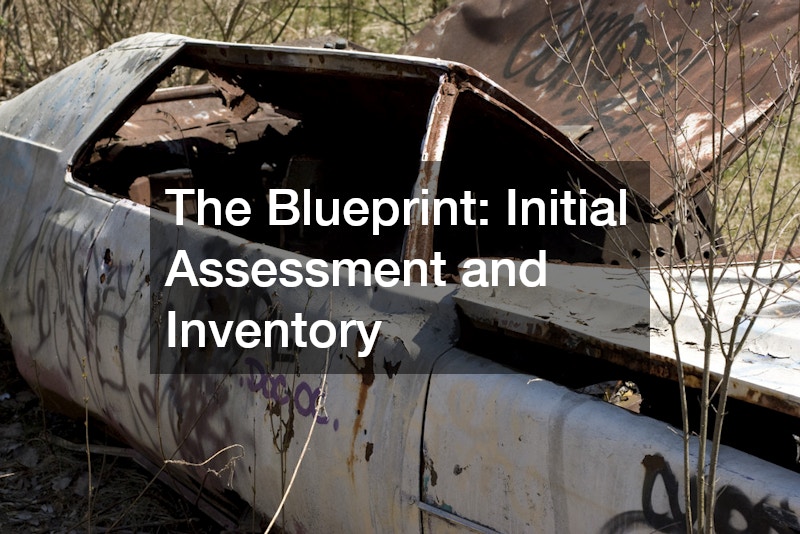
The first few weeks of a restoration set the tone for the next several years. Many hobbyists rush into the teardown phase, only to find themselves eighteen months later with a garage full of mystery bolts and unidentifiable brackets. A systematic approach to the “as-is” state of the car is paramount.
- Photography and Documentation:
You cannot take too many photos. Document the routing of every brake line, the orientation of every clip, and the specific color of every wire. These photos will be your primary reference when you are trying to remember how the dashboard assembly fits together three years from now. - The Bag-and-Tag Method:
Every single fastener should be placed in a heavy-duty freezer bag with a permanent marker label. Organize these by sub-system: “Front Left Suspension,” “Interior Trim – Driver Side,” or “Decklid Hinges.” - Professional Evaluation:
Even if you are an experienced wrencher, having a third-party vehicle inspection performed can be eye-opening. A professional can use ultrasonic thickness gauges to check for frame thinning or use a borescope to look for internal engine corrosion that might dictate whether a block is salvageable. - Strategic Consulting:
Early in the process, sit down with a master mechanic who specializes in your specific make and model. They can point out “unobtainium” parts and components that are no longer manufactured, allowing you to start your search on auction sites and enthusiast forums immediately, rather than halting the build later.
The Powerhouse: Rebuilding the Drivetrain and Transmission
The drivetrain is the mechanical soul of the car. In a full restoration, the goal is “zero-mile” reliability. This means every internal component is inspected, measured against factory tolerances, and replaced if necessary.
- Engine Machining and Assembly:
For many, the engine is the centerpiece. The block must be hot-tanked to remove decades of sludge, then checked for cracks. Cylinders are usually bored and honed to ensure a perfect seal for new pistons. Modern internal upgrades, like hardened valve seats, allow vintage engines to run on modern unleaded fuel without additives. - The Transmission Overhaul:
Gearboxes are often the “black box” of restoration. Because they require specialized pullers, hydraulic presses, and precise shimming, many owners choose to outsource this to reputable
transmission shops. A professional rebuild ensures that synchros are crisp, seals are tight, and the power reaches the wheels without whining or slipping - Ancillary Systems:
Don’t forget the “supporting cast.” The starter, alternator, and water pump should all be rebuilt or replaced. During the reassembly of these systems, treat the work with the same precision as a high-stakes auto repair job. Use high-quality gaskets and aviation-grade thread sealant to ensure your pristine driveway stays oil-free.
Safety and Control: Chassis, Suspension, and Brakes
A restored car that looks like a million dollars but drives like a shopping cart is a failure. The chassis and suspension phase is where you transform the handling characteristics from “vintage boat” to “modern precision.”
- Frame and Suspension:
The frame should be sandblasted to bare metal to check for “spider-web” cracks near high-stress mounting points. All rubber bushings should be pressed out and replaced. While rubber offers a period-correct ride, polyurethane bushings offer a tighter feel and won’t rot over time. - Stopping Power:
Safety is the one area where “originality” often takes a backseat to utility. While keeping original drum brakes is fine for museum pieces, most “drivers” benefit from a disc brake repair or full conversion. Modern dual-master cylinders also provide a failsafe; if a rear brake line leaks, the front brakes will still function. - The Logistics of Sourcing:
You will inevitably break a rare bolt or lose a proprietary spring. Having a reliable local auto part store that understands the needs of restorers— or knows how to navigate old catalogs— is an invaluable asset. Sometimes, the difference between a weekend of progress and a month of waiting is a clerk who knows how to cross-reference part numbers from the 1960s.
Interior Comfort and Modern Integration
The interior is your primary interface with the machine. A full restoration involves stripping the cabin to the bare floorboards, treating the metal for rust, and layering in modern technology that remains invisible to the eye.
- Wiring and Electronics:
Old wiring becomes brittle and develops high resistance, leading to dim headlights and electrical fires. Installing a modern, fused wiring harness is one of the smartest investments you can make. It provides the backbone for improved lighting and modern charging systems. - Climate Control Upgrades:
If you live in a warm climate, an original AC system might not be up to the task. Modern car ac repair specialists can now retrofit high-output, sanden-style compressors into vintage brackets. These systems are more efficient, draw less power from the engine, and use environmentally friendly R134a or R1234yf refrigerants. - Subtle Enhancements:
This is the phase for “restomod” touches or car modifications that improve the experience without ruining the aesthetic. Think hidden Bluetooth modules, sound-deadening mats (like Dynamat) under the carpet, and LED conversions for the gauge cluster that make the needles actually visible at night.
Bodywork and the Art of the Finish
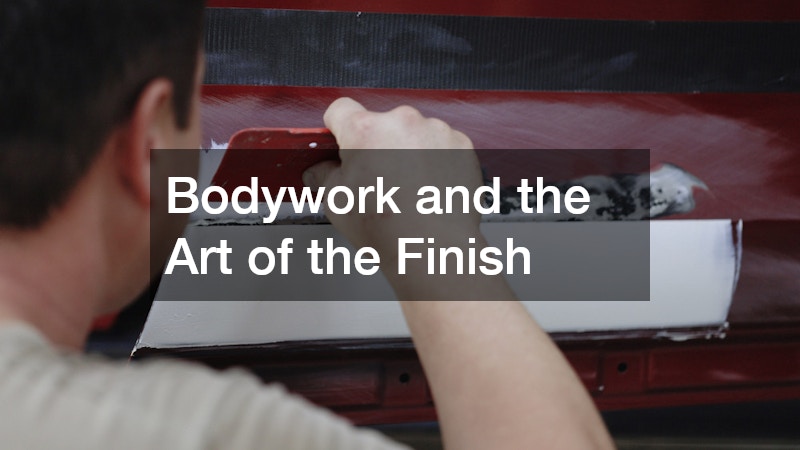
Bodywork is the most labor-intensive part of any restoration. It requires patience, a keen eye for “straightness,” and hundreds of hours of sanding.
- Metalwork and Rust Remediation:
The golden rule of restoration is “cut and weld.” Never use plastic filler to bridge a hole. Patch panels should be butt-welded and ground smooth. This ensures that the rust won’t return to bubble your expensive paint job in three years. - Glass and Visibility:
Scratched or “milky” glass can ruin the look of a car. While side glass is often easy to find, the windshield is a structural and safety component. If yours is pitted from years of road debris, a professional windshield repair service can advise if the glass can be saved or if a reproduction unit is necessary for safety. - Aesthetic Protection:
Once the paint is buffed to a mirror shine, you need to protect that investment. While some purists prefer traditional wax, many modern restorers apply a high-quality vehicle wrap in the form of clear Paint Protection Film (PPF) on high-impact areas like the nose and rocker panels to prevent rock chips. - Final Buffing:
The “cut and buff” process removes the “orange peel” texture from the clear coat, giving the paint that deep, liquid look associated with high-end builds.
The Assembly and the “First Start”
As the car starts to look like a car again, the excitement grows, but this is when mistakes happen. The final assembly requires a delicate touch to avoid scratching the new paint or tearing the new upholstery.
- The Marriage:
Dropping the engine and transmission into a freshly painted engine bay is a high-stress event. Use fender covers, moving blankets, and at least two spotters to ensure nothing touches the firewall. - Fluid Selection:
Don’t just pour in the cheapest oil. Use high-zinc “break-in” oil for flat-tappet camshafts, and ensure the cooling system is vacuum-bled to prevent air pockets that could cause an immediate overheat. - The Shake-Down:
Your first drive should be around the block— not across the state. Listen for rattles, feel for vibrations in the steering wheel, and constantly monitor the oil pressure and water temperature gauges.
Deep Dive: Managing the Restoration Budget
One of the most sobering aspects of a full restoration is the cost. It is often said that you will spend twice as much as you planned and take three times as long. Managing your finances is as important as managing your mechanical tasks.
The “Thirds” Rule of Budgeting
A helpful way to visualize a restoration budget is to divide it into three equal parts:
- The Acquisition and Heavy Metal:
This includes the initial purchase of the vehicle and the primary metalwork/paint. - The Mechanicals:
This covers the engine, transmission, suspension, and brake systems. - The “Jewelry” and Interior:
This includes chrome plating, upholstery, glass, and all the small trim pieces that add up surprisingly fast.
Where to Save vs. Where to Splurge

- Splurge on Safety:
Never cheap out on tires, brake lines, or steering components. Your life literally depends on these items. - Save on “Hidden” Items:
You don’t always need the most expensive brand-name sound deadener or floor mats. Sourcing generic versions of secondary materials can save hundreds of dollars. - Splurge on Paint Prep:
The final color is only as good as the sanding underneath. If you’re going to pay a pro, pay them for the prep work, not just the “spray.”
Sourcing Parts: The Global Scavenger Hunt
Restoring a vehicle often turns you into a part-time detective. Depending on the rarity of your vehicle, you may need to source parts from across the globe.
- NOS (New Old Stock):
These are parts manufactured decades ago that have sat on a shelf in their original packaging. They offer the best fitment but are often the most expensive. - Reproduction Parts:
Many companies specialize in making new parts for old cars. Be wary of quality; sometimes “repro” chrome is thinner than the original, or rubber seals don’t quite line up. - Donor Vehicles:
Sometimes it is cheaper to buy a second “parts car” than to buy individual components. Having a spare dashboard, window regulator, or set of door handles can be a godsend. - Fabrication:
If a part doesn’t exist, you may have to have it made. This is where 3D printing and CNC machining are changing the restoration landscape, allowing enthusiasts to recreate plastic clips or metal brackets that haven’t been in a catalog since 1974.
The Importance of Shop Environment
You cannot perform a world-class restoration in a cluttered, dark, or damp environment. Your workspace dictates the quality of your output.
- Lighting:
You need “daylight” balanced LED shop lights. If you can’t see the swirl marks in the paint or the hairline crack in a manifold, you can’t fix them. - Organization:
Invest in a high-quality rolling tool chest and a workbench with a heavy-duty vise. - Cleanliness:
Dust is the enemy of both paint and engine assembly. Keep your “dirty” work (grinding, sanding) physically separated from your “clean” work (engine building, interior installation) if possible. If you only have a one-car garage, use plastic sheeting to wall off areas during different phases. - Safety Gear:
Restoration involves nasty chemicals, flying metal sparks, and heavy lifting. A proper respirator, face shield, and a set of jack stands are mandatory, not optional.
Documenting the Legacy
As the project nears completion, the documentation you started on day one becomes a valuable asset. A “restoration book” containing every receipt, every photograph, and a log of every hour spent not only adds significant resale value but also tells the story of the car’s rebirth.
- The Receipt Binder:
Organize receipts by category (Mechanical, Body, Interior). This is crucial for insurance purposes, as a standard “blue book” value will not cover the cost of a restored vehicle. You will need an “agreed value” policy. - The Storyboard:
Create a digital or physical album showing the “Before, During, and After.” Sharing this journey on social media or at car shows helps build a community around the vehicle. - Maintenance Logs:
Start a fresh logbook on the day of the first start. Treat it like a brand-new car’s service manual.
Final Thoughts: The Emotional Journey

There will be a Tuesday night, probably three years into the project, where you are covered in grease, you’ve just snapped a rare bolt, and you’re wondering why you ever started. This is the “Restorer’s Wall.” Every great builder hits it.
The key to finishing is to break the project down into “micro-wins.” Don’t look at the whole car; look at the heater box. Finish the heater box. Then look at the left front spindle. Finish the spindle. These small victories provide the dopamine hits necessary to keep you coming back to the garage.
Restoration is a test of character as much as a test of mechanical skill. It requires a level of persistence that few other hobbies demand. But when you finally pull that car out of the garage under its own power, the sunlight hitting the fresh paint and the exhaust note echoing off the walls, the years of work will vanish in an instant. You haven’t just fixed a car; you’ve rescued a piece of history, saved a work of art, and proven that with enough time and dedication, anything can be made new again.
Restoration Milestone Checklist
- Months 1-3:
Teardown, inventory, and media blasting. - Month 4-10:
Metalwork, rust repair, and “mock-up” of all components. - Months 11-15:
Engine and transmission rebuild; chassis painting. - Months 16-20:
Body prep and final paint. - Months 21-24:
Final assembly, interior, and electrical. - Month 25+:
Shake-down testing and final detailing.
The road is long, but the destination is spectacular. Take your time, do it right the first time, and enjoy every greasy, difficult, rewarding minute of the process.

