
There is something deeply satisfying about taking a neglected, rusted, or broken-down vehicle and bringing it back to life. Project cars represent more than just a mechanical challenge – they are a chance to learn, create, and ultimately drive something that carries your personal investment in every bolt and panel. Whether you are drawn to a numbers-matching muscle car restoration, a restomod with modern performance under a classic shell, or a budget build that simply needs some love, the journey from rough find to finished product is one of the most rewarding experiences in the automotive world.
But that journey can also be expensive and full of surprises if you go in without a plan. Costs spiral, parts go missing, and what looked like a solid shell in photos turns out to have serious issues underneath. The difference between a successful build and an abandoned money pit almost always comes down to preparation, knowledge, and having the right professionals in your corner.
This guide walks you through every major phase – from finding the right vehicle and inspecting it before you buy, to transporting it home, rebuilding it right, and putting the finishing touches on a build you can be proud of.
How to Find the Right Project Car for Your Skill Level and Budget

Before you start browsing listings, get honest about two things: what you want to build and what you can realistically afford. These questions shape every decision that follows, and getting them wrong is one of the most common reasons project cars stall out in someone’s garage for years.
Define your build goals first. Are you going for a true factory restoration? A restomod with modern suspension and fuel injection? Or a performance build stripped down for track use? Each path has different labor demands, parts availability challenges, and cost ceilings. Knowing your goal upfront keeps you from buying the wrong platform.
Set a two-part budget. Your total budget needs to cover both the purchase price and restoration costs – and the restoration side almost always costs more than beginners expect. A common rule of thumb is to spend no more than one-third of your total budget on the car itself, leaving the rest for parts, labor, and unexpected repairs.
When sourcing a project car, most people start with online marketplaces like Craigslist, Facebook Marketplace, or specialty sites like Bring a Trailer. One often-overlooked source is scrap yards. Many people associate scrap yards with crushed, unusable wrecks, but a good salvage yard can be a goldmine for finding project vehicles towed in after minor accidents, along with rare trim pieces and hard-to-find OEM parts at a fraction of retail cost.
Watch for these red flags in listings:
- Photos that avoid showing the undercarriage, floors, or engine bay
- Vague claims that the car “just needs minor work.”
- Vehicles sitting outside for years with high rust risk
- Missing the engine, transmission, or title documentation
How to Properly Inspect a Project Car Before You Buy
The pre-purchase inspection is the most important step before handing over money. A thorough inspection separates a solid project from a financial disaster, and it is almost always worth paying a mechanic to join you.
Start with the structure. Get under the car and examine the frame rails, floor pans, and rocker panels. Poke at suspicious areas with a screwdriver – rust that looks surface-level on top is often through-and-through underneath. Frame damage from a prior accident adds thousands to your restoration cost and may permanently compromise the vehicle’s safety.
Move to the engine and drivetrain. Pull the dipstick and look for milky oil, check for cracks in the block, and listen carefully for knocking or excessive smoke at startup if the car runs.
One of the most revealing inspection points is the suspension and steering system. Grab each front tire and try to shake it – excessive play indicates worn ball joints or tie rod ends. Uneven tire wear is a direct indicator of wheel alignment problems, which can point to bent control arms, a damaged subframe, or prior collision damage never properly repaired. Identifying these issues before purchase significantly affects your restoration budget.
Bring these to every inspection:
- Flashlight and mirror for tight spaces
- Screwdriver for probing rust spots
- OBD-II scanner for 1996 and newer vehicles
- Phone for photos and documentation
Use everything you find to negotiate the price. Every repair needed is a valid reason to reduce the ask.
How to Get Your Project Car Home Safely Without Damage
Driving an uninspected or mechanically questionable project car on public roads is dangerous and illegal in most states. Your main transport options are a rental trailer, a flatbed tow truck, or flat towing.
Flat towing – connecting the project car directly behind another vehicle with a tow bar, all four wheels on the ground – is cost-effective but comes with important caveats. It is only safe for vehicles whose transmission and drivetrain configuration allow it. Many automatic transmissions require the driveshaft to be disconnected first to avoid serious internal damage. Always research your specific make and model before choosing flat towing, and use proper safety chains and lighting connections regardless of distance.
For most project cars, especially those with unknown mechanical conditions, a flatbed is the safest option. Nothing touches the ground, and the car is fully secured during transport.
Have these ready before the car arrives:
- Clear the workspace with jack stands and a rated floor jack
- Fire extinguisher, especially if the fuel system is old
- Drain pans for fluids
- A preliminary parts list so you can start ordering immediately
How to Protect Your Investment Before You Swing a Wrench
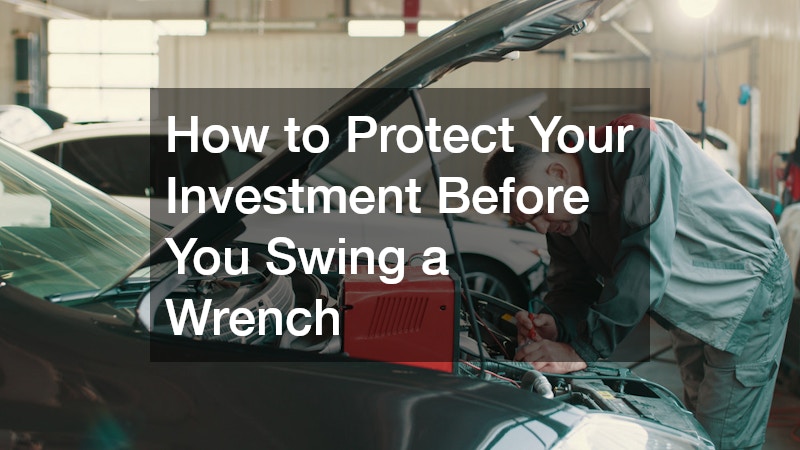
Many builders dive straight into teardown without first handling two critical steps: insurance and proper storage. Skipping them can cost far more in the long run.
Standard auto insurance policies typically will not cover a non-running, unregistered vehicle. Specialty providers like Hagerty or Grundy offer policies designed for vehicles under restoration, including agreed-value coverage that pays what you and the insurer agreed upon – not a depreciated market value. Storing your project at dedicated storage facilities can work in your favor here, as many insurers offer lower premiums for vehicles kept in secure, enclosed storage. Climate-controlled storage facilities are especially valuable for cars with rust risk or original upholstery, protecting them from humidity, temperature swings, and rodent damage during a long build.
Smart storage tips:
- Use a breathable car cover, not a plastic tarp
- Place the car on jack stands to relieve tire and suspension pressure
- Add fuel stabilizer if gas remains in the tank
- Use a trickle charger to maintain the battery
- Check the unit monthly after severe weather
How to Strip and Prep Your Car for a Full Restoration
Proper disassembly and surface preparation are the foundation of any good restoration. Work in logical order: interior first, then glass, then mechanical components. Label every connector, bag every set of hardware, and photograph everything before disconnecting anything.
Once stripped to bare metal, sandblasting is one of the most effective prep methods available. Unlike grinding or chemical stripping, sandblasting reaches into seams, corners, and recessed areas that are nearly impossible to clean by hand, leaving a textured surface that primer bonds to extremely well. For a full-car project, hiring a professional is almost always worth it over attempting to DIY with a consumer-grade unit. After blasting, work quickly – bare metal begins oxidizing within hours, so primer should be ready to apply immediately.
After sandblasting:
- Inspect every inch of bare metal for pinholes or structural rust
- Apply the self-etching primer as quickly as possible
- Use high-build primer on areas needing body filler
- Block sand for a flat, straight surface before the topcoat
How to Address Structural Damage and Custom Bodywork the Right Way
Bodywork and structural repair are where project car budgets take their hardest hit – and where the quality of your finished build is largely determined. Poor structural repairs are a safety issue, not just an aesthetic one.
Rust repair falls into three categories: surface rust (cosmetic), scale rust (requires aggressive treatment), and structural rust in the floor pans or frame rails, which must be cut out and replaced entirely. Painting over structural rust does not fix the problem – it hides it until the metal fails.
For floor pan replacement and frame repair, hiring a professional welding company is strongly recommended unless you have significant experience with thin automotive sheet metal. A skilled welding company ensures structural welds meet safety standards and that patch panels are fitted cleanly before paint. Custom metal fabrication is equally valuable for vehicles where replacement panels are no longer manufactured – a fabricator can build floor sections, firewall patches, and inner fenders from raw sheet metal, matching original contours or creating something entirely new. Get at least three quotes and ask to see examples of previous restoration work before committing.
How to Rebuild or Upgrade Your Engine the Right Way
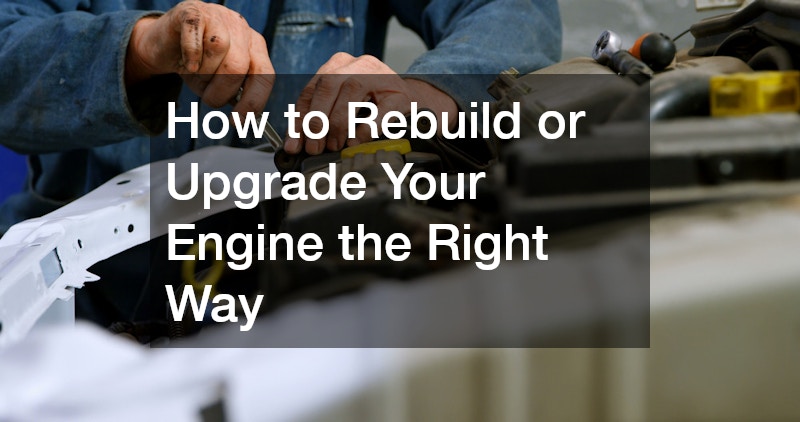
You have three paths for the engine: rebuild the original, replace it with a known-good unit, or upgrade to something different entirely. Rebuilding is often the best choice for restoration-focused builds where matching numbers matters for value.
A full rebuild involves disassembling the engine completely and reconditioning parts worn beyond acceptable tolerances. This is where an engine machine shop becomes essential. An engine machine shop offers precision services that cannot be replicated with hand tools – cylinder boring and honing, crankshaft grinding, deck surface resurfacing, and dynamic balancing of rotating assemblies. The difference between an engine rebuilt with and without proper machine work is enormous in terms of longevity and performance. When choosing an engine machine shop, look for experience with your specific engine type and ask about their warranty on machine work.
Key questions to ask before committing:
- Do you have experience with my specific engine family?
- What is included in a standard rebuild package?
- Do you source parts, or should I supply them?
- What is your warranty on machine work?
For swap builds, sourcing a low-mileage donor engine from a reputable salvage yard is a cost-effective path to reliable power, though swaps add complexity in mounts, wiring, and drivetrain compatibility.
How to Finish Your Build with the Right Upgrades and Extras
As the mechanical restoration comes together, take your time with the finishing phase. The details matter, and rushing here shows in the final product.
Start with safety before anything else. Inspect and bleed the brakes, check all lighting, and get a proper four-wheel alignment after reassembly. Any time suspension components have been replaced or adjusted, alignment must be reset to ensure predictable handling and even tire wear.
Once safety is sorted, think about comfort and personalization. Car audio is one area that gets overlooked in project builds. Installing a modern car audio system is far easier to plan before the interior goes back in – run speaker wires and power cables through bare metal rather than through finished trim. A single or double-DIN head unit, door speakers in custom-fabricated pods, and a compact amplifier tucked under a seat can deliver a modern listening experience without compromising the character of the build.
Final checklist before the first drive:
- Four-wheel alignment completed
- All fluids checked and topped
- Brake pedal firm and consistent
- All lights functional
- Seatbelts installed and working
- Fire extinguisher mounted and accessible
- Insurance updated to reflect the completed vehicle
Take your first drive in a low-traffic area. Listen for unusual noises, feel for vibrations, and make sure the car tracks straight. Log any issues immediately before putting real miles on the build.
The Finish Line is Closer Than You Think

Buying and restoring a project car demands patience, planning, and a willingness to ask for help when the work exceeds your skill level. The builds that get finished are not always the ones with the biggest budgets – they are the ones with the best plans.
Work through the restoration in a logical order, surround yourself with capable shops and specialists, and document everything along the way. Photos and notes not only help during reassembly – they become part of the story of the car.
When you finally turn the key on a vehicle you have rebuilt from the ground up, the feeling is unlike anything else in the automotive world. That moment makes every challenge along the way worth it.